CLICK FOR STEP BY STEP INSTRUCTIONS
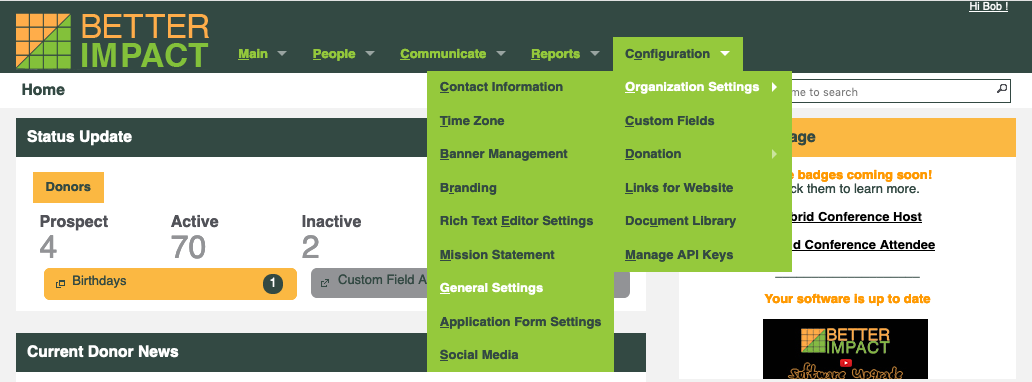
- Go to Configuration >> Organization Settings >> General settings

- Select the currency to be associated with donations to your organization from the drop-down list provided.
- Enter the tax ID that is associated with your registered charity.
- Select the Donation Source to be associated with online donations from the droplist.
- Select the Donation Type to be associated with online donations from the droplist.

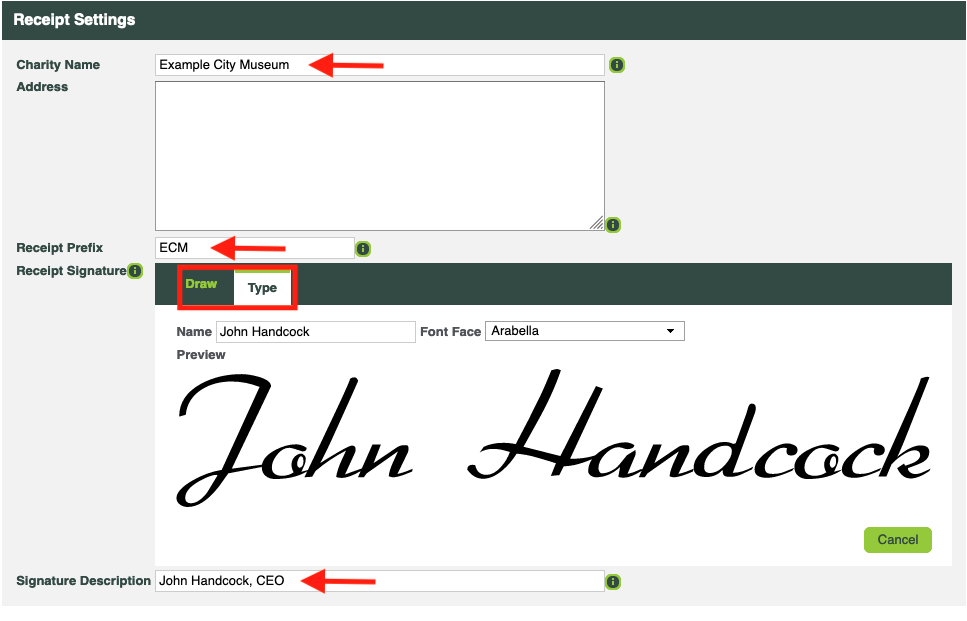
- Under the receipt settings header, enter the name of your charity to be displayed on donation receipts.
- If desired, enter the address for your organization to be displayed on donation receipts.
- Enter a prefix to be applied to the donation receipt that is generated.
- Enter your receipt signature by drawing or typing your text and selecting the desired font.
- Enter your signature description (this could include the person’s name, position or both).

- Scroll to the customization settings header and enter and format your text that will display on your public page. You can also add images, links to files and videos.

- Enter the subject line of the message that will be emailed to the donor upon successful submission of a donation.
- Use the Donation Email Body to compose the message that will be emailed to the donor.

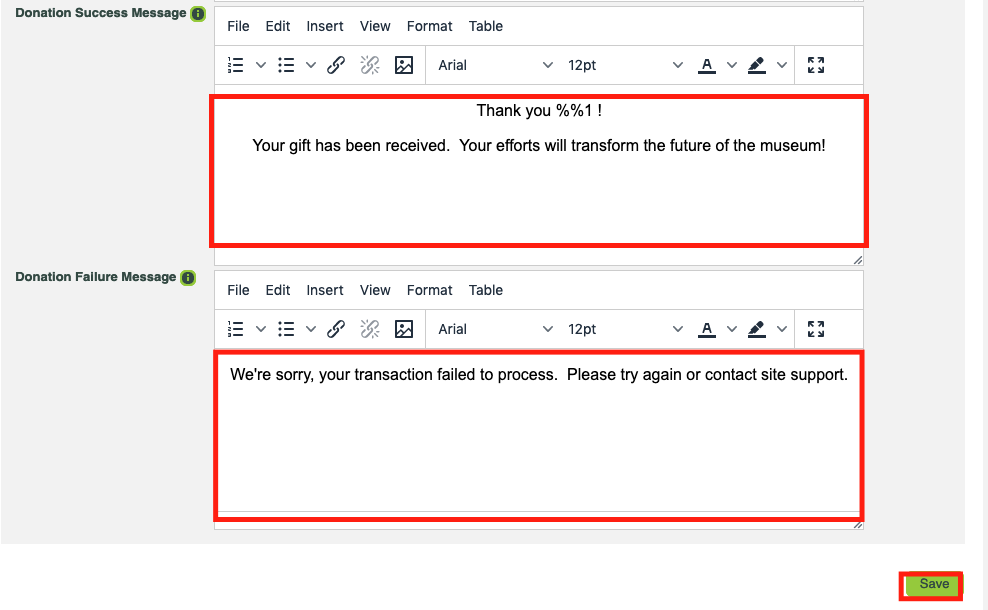
- Add the message that will appear on the screen after a successful online donation.
- Add the message that will appear on the screen after a failed online donation.
- Click [Save].


